Monday, December 10, 2018

Deck the Halls

Happy Monday! I'm coming off a very busy weekend with family and prepping for the holidays. No decking of halls buts lots of gift wrapping. With a large family, there is definitely more of that in my future.

Today sharing a card made with Concord & 9th's Deck the Halls turnabout stamp set and PTI Holiday Double Cut dies. Lots of gold embossing and sparkle on this more traditional color schemed card.


Saturday, December 8, 2018

CN9 Cozy Christmas

Been holiday crafting and baking since mid-November. Every year I make a promise to myself to start earlier, plan it all out and then something or another disrupts my best intentions. I try not to stress about it too much after all this is supposed to be the most wonderful time of the year...and honestly if some of the items don't get completed the only person usually disappointed is me.

The good news is my church's holiday cookie walk and bake sale is done! We had a great turnout and some wonderful cookies, candies and desserts. I feel like I gained inches just walking by the displays of goodies. I'll post some images at some point, mainly of the decorated cookies I create for the sale. I like to do a comparison on my decorating progress and capacity. Five years ago when I began learning to use royal icing it took me an entire week to decorate a couple dozen cookies, this year I managed to complete 247 cookies in the same amount of time. Progress!

Along with baking, I have been busy creating some holiday cards. I always read about the super organized starting their holiday card production in mid-summer. Yeah, so NOT me. Envious? Yes! But I can never seem to break out the Christmas stamps earlier than November.

Today I'm sharing a card I created with Concord & 9th's Cozy Christmas stamp set. I'm a sucker for knit patterned stamps. The minute I saw the release this baby made its way into the cart. Washi tape from Michaels and those cute little mittens are from Simple Stories.

I'll be posting more this week as I finally got around to photographing all my cards and crafty things for the holidays.


Saturday, November 17, 2018

PTI Twig Wreath

Another autumn inspired card for Thanksgiving. This one is using PTI's Twig Wreath along with the new dies from CZ. I stacked several die cuts for some slight dimension. I stamped the envelope with a set from Concord & 9th, pulling the colors from the wreath.


Friday, November 16, 2018

PTI Autumn Hills

Hello. Just a quick post today. I'm in the midst of renovating again so my time and energy are being spent on caulking, scrubbing and nailing. It's a good thing I had prepped some cards last month for the Thanksgiving season. I have a lot to be thankful for this year and high on my list are friends and family always on the ready to lend a helping hand when my schedule gets a bit too crazy. I'm spending a little each morning expressing my gratitude and keeping the postman busy.

The card I'm sharing today was made with an old PTI set Autumn Hills. This is definitely one of my favorites and makes a beautiful card reflecting all the splendor of autumn.


Friday, September 21, 2018

CN9 Wreath Turnabout Fall

Another Fall card this time using the Concord & 9th Wreath Turnabout stamp set. I've pulled this stamp set out a number of times this year. I'm guessing I'll pull it out one more time to try a holiday-themed color palette.


The sentiment is from a PTI set. I copper embossed the sentiment onto a strip of vellum.  I used a strip of light purple vellum behind the sentiment strip to give it a bit more pop and prevent it from blending into the background. And just for full transparency, that purple vellum is older than my nephew who's turning 24 this year. Well past time it got put to use!


Wednesday, September 19, 2018

CN9 Thank You Cards

Few more thank you cards this week. These are made using Concord & 9th products.


The background image is using the Lace Leaf stamp set. I see many people doing beautiful swashes of watercolor and inks as backgrounds. I've tried a few times but I'm just not very good. What I envision and the results are far different. More practice is needed but with so many nice messy background stamps available I really have little motivation to improve my hand at watercolor. I much rather expand my background stamp collection! This one is a winner. Like the results and it's a good size. 


What I'm really swooning over at the moment though is their Double Cut Alphabet dies. Nice modern, bold feel lending itself well to masculine cards and clean design. I'm hoping they come out with the same font as already formulated words. I made 8 cards and by #6 I was a bit tired of lining up  YOU to create the shadow effect. Maybe they can help a gal out?! 

Tuesday, September 18, 2018

MFT Flamazing Thank You

I make a lot of thank you cards. I have many blessings in my life and am a firm believer in recognizing acts of kindness and deeds well done. It doesn't hurt belonging to an old church which frequently needs some TLC and elbow grease. Your house or God's house, it all occasionally needs work and a note of thanks to the volunteers goes a long way toward ensuring future participation.

This is one of the cards I made thinking I would enter it into MFT's Superstar challenge but then opted to go with the Snow Flurry harvest wreath.


I use the radiating template for the background. It's one of my favorites and use it frequently. The Thank You die has been in my stash for a while; it's the first time I'm using it and I really like it. The stamps are from the Flamazing stamp set. 


Monday, September 17, 2018

My Favorite Things Superstar


MFT is running their Design Superstar contest. Today is the last day for entry and isn't it just like me to be getting my submission in just under the wire. My entry is for the CAS category. I actually created several cards, I'll show those later in the week. As for now....this is my card.


I used 3 different stamp sets to create the image and sentiment. The wreath was created using stamps from Snowflake Flurry. I'm still in the Fall mood so I was looking for something autumn themed. As I was going through my MFT stamps I thought some of the snowflake images looked like wheat or twigs. With the right colors, I thought it would make for a pretty harvest wreath/medallion design. Love the end design...and deceptively simple to do without any fancy tools. Really!

All I used was a 21/2" circular punch, punched from Avery removable ID labels. Folded the circle in half, opened it, folded it in half from the other side, repeated until I had 8 even folds. Took a black marker and placed a dot at the top edge of each fold, which gave me a guide so the snowflakes were evenly spaced when stamping. Centered the removable circle onto my cardstock and went to town. You do have to move the stamps around your template but it went quickly. Peel off your mask and you have a beautiful design with space for an image or sentiment.


The center image was taken from the Funky Flowers set and the sentiment from Flamazing. I used Copics to shade the flower and a shimmer pen to add sparkle to some of the leaves and detail to the flower center. One layer card for easy, peasy mailing! I'm definitely going to attempt this again. 


Sunday, September 9, 2018

It's Fall Ya'll...well almost

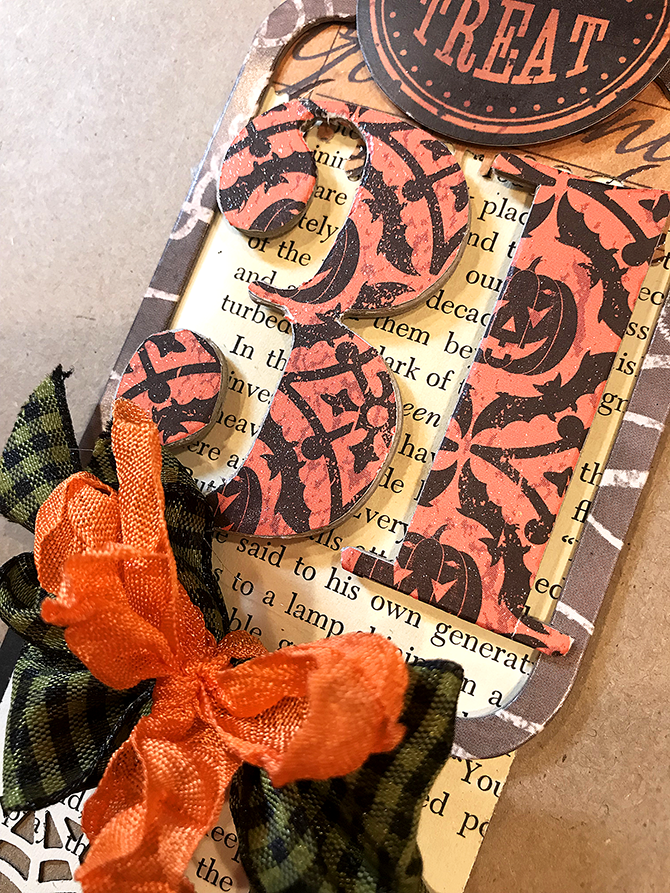
We had a beautiful, crisp Autumn-like day today. It promises to get warmer again during the week but today had me itching for weather cool enough to pull out sweaters, boots, and scarves. I love Fall! I love the colors, the activities, the food, and the cooler temps. But since we're not quite there yet I had to feed my need by pulling out some Autumn themed stamps and dies. And yes, I still have some work to complete all my Halloween tags but sometimes you just have to take a break and go with what inspires you at the moment. At least this what I'm telling myself to justify my detour.

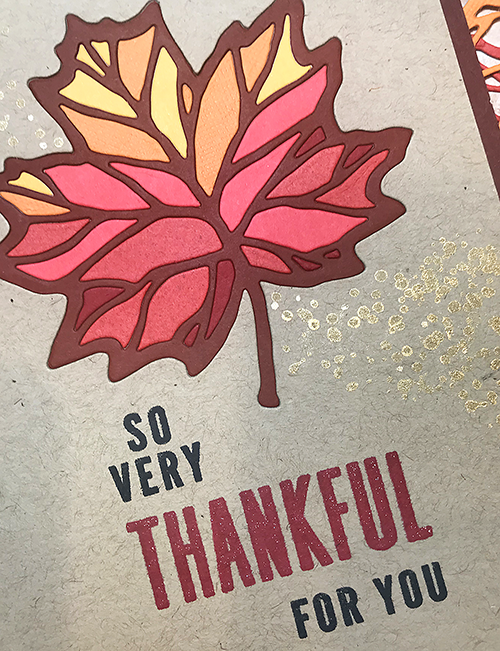
This card was created using the Thankful Leaves die and Turnabout stamp set from Concord & 9th. I'm very much into their turnabout stamps, especially the wreath builder. They create such beautiful backgrounds and focal points. On this particular card, I just used the sentiment from the Thankful Leaves Turnabout but I'm eager to experiment with actual turnabout portion. For the gold dot spray, I used a stamp from the Just Because set.


For the main image, I first die cut the leaf using a craft panel making sure I centered the image. Then I glued the die cut panel onto another panel and fitted the leaf outline into the slot. This creates a nice flat card for mailing. Then it was just a matter of filling in the pieces. Since I wanted to create an ombre effect, I pulled cardstock from my scrap pile similar in color and tone and cut several leaves.


Now I first ran the cardstock thru the Xyron so I wouldn't need to mess with gluing down the pieces, but then you're stuck pulling off the release paper...and some of those pieces are pretty tiny. I think next time the better option is to place the adhesive on the base panel then place the die cut panel on top so the adhesive is exposed in the leaf area then position the pieces. Oh well, live and learn.

Friday, September 7, 2018

Stash Busting Part II

As you know, I'm diligently attempting to reduce my Halloween stash. I managed to complete little more than half the tags needed for my project on Monday using old stickers, frames, and papers.  Had a lot of fun just playing and not overthinking placement or combinations. Each tag is unique. Since I often make a large number of favors for an event, the freedom from repetition is a bonus.

A few more images to share. Today promises to be another rainy day so I'm hoping to complete the remaining tags and then share the final packaging.


Monday, September 3, 2018

Stash Busting

It's a rainy, dreary day in this part of the country so today I'm spending time in the craft room prepping for Halloween. I usually don't create a lot of Halloween items, though it hasn't stopped me from collecting a lot of themed items over the years. A few cards and a few treat bags for the kids is the norm and typically in a mad dash at the end of October.  This year volunteered to provide the treat bags for the Great Agers luncheon so I need to prep 36 treat bags. Good motivation to begin early and to make a hefty dent into my stash.

Here are a few peaks of the tags I'm creating. More to come.


Thursday, August 30, 2018

Concord & 9th Wreath Builder

Bought this set a while back and absolutely LOVE it. It's one of the few sets I gravitate towards over and over. It's that versatile.


Here I've paired it with some punched flowers, a banner cut with my Cameo and a die in bright summer colors. I'm eager to try it using shades of Fall or maybe some darker greens and red for the holiday season.


Tuesday, August 28, 2018

This and That

Really? I could have sworn the last time I'd posted had been at least around April. Nope! Shouldn't be surprised; I do most of my crafting in early Fall and Winter. The minute the temps warm up there is always plenty of work to do inside and out. This year it was renovations...first my house and then my sister's. Reno blogs always look so wonderful until you're actually in the midst of doing the actual work. I give props to all the individuals out there documenting along the way, not only because I found several tutorials extremely helpful during my own home improvements, but also because I have no idea where any of them find the time or energy to document and share along the way. Recording progress was the absolute last thing on my mind. My thoughts tended to center around, "I'm hot! I'm tired! It better be worth it!". It was...and it will take all Fall and Winter before I even contemplate tackling another home improvement project. Or maybe all of 2019.

So I finally made my way back into the craft room a couple of weeks ago, got out my stamps and my colored pencils for some well-deserved playtime. This card uses multiple sets. I think the sentiment is from Teresa Collins, the leaves from a PTI set and flowers from a Hero Arts set. All older stamps.


I used a kraft cardstock as my base since I wanted to try coloring on a colored cardstock and added a bit of shimmer on some of the details. I also stamped and colored an envelope to match. I always think it's nice to receive a pretty envelope. Then you know it's happy mail.


Monday, February 26, 2018

PL Week 6

I mentioned before one of my goals this year was to get back into scrapping, which includes my Project Life pages. Over the years my approach has changed. I still design my pages digitally, and I suspect at some point I may opt to have the pages printed in a book, but at the moment I print them and slip them into an 8.5x11 page protector. Often I'll turn off some of the embellishment layers before printing so I can add those elements using traditional methods so I end up with a hybrid layout. I like adding the little embellishments which uses some of my stash, and not spending the time trimming and lining up photos or slipping them into pockets. And, let's face it, there are very few options for the latter since I stick with 8.5x11.

The area where my approach has changed is how I record. I don't get caught up in documenting every week. Some weeks are busy and I actually remember to take lots of images; some days I forget to take photos and sometimes when I take photos the images are just total crap. So I focus on capturing what makes sense. I don't have a week 2 for 2018 and I probably won't have a week 7...and I'm okay with that.


Saturday, February 24, 2018

MFT Sweet Succulents

I got this set last year but am just getting around to getting it out of the packaging. Definitely should have broken it out sooner because I'm in love with these images. Its been so much fun to play around with different combinations of cati, pots and backgrounds. What little free time I had this week found me at my craft table stamping and coloring.


This is the first card I made this week. It got more complicated from there with blended backgrounds and masking. Simple or complicated, I love them all and now have several "get well" and "thinking of you" cards in my stash.


Monday, February 19, 2018

21st Birthday

My nephew turns 21 this month. He's the third one of my nephews and niece to hit 21 so we won't even go into just how old that makes me feel. Not only does he turn 21, but it is also his golden birthday. I don't think it gets much better than 21 on the 21st. We're gearing up for a big celebration, though I'm going to leave the partying into the wee hours to those much younger.

The special day (and guy) deserves a special card. This one came together pretty quickly thanks to the Silhouette design store, some old chipboard numbers, glitter paper, and glitter tape. I use the Radiant Banner card from Hero Arts. Did a gradient fill and then just printed the background onto some Staples photo supreme matte paper. I love this paper for printing. It always delivers vibrant, crisp color. It's a bit more of a challenge if I use it for print and cuts. I think it has a high fiber count because I have to use a well-loved mat or risk tearing the paper when I try to release the cut images. It also requires a double cut and preferably a new blade. But I deviate, since this time I just printed the image and trimmed by hand.


Honestly, I can't remember the manufacturer of the chipboard numbers. They've been in my stash for a very long time. I'm not big on chipboard and you know I generally like my card pretty flat. These have quite a bit of dimension but since this card is hand delivered it is not a problem.


I really like the card but I'm guessing that he'll spend more time admiring the check inside the card than the card itself.

Monday, February 12, 2018

Valentines

Quick post to share the last of my Valentine cards. Again, kept it simple using mostly premade embellishments from my stash of supplies. I loved the window card I created last week so I made a few more though this time round I put a bit more thought into the assembly so I wasn't lifting and repositioning.

Used Papertrey Ink cardstock for the base. Rustic white. Love this stuff, especially the weight of the cardstock which will hold up to layers, stamping and distressing. Definitely one of my favorites. And while the specks in the rustic line tend to darken when photographed in person I think it has the perfect blend of modern, earthy tone which I like for masculine cards.


Friday, February 9, 2018

Happy Hearts

It was a snow day in our area today. Kids off from school and those who could worked from home. I was undecided whether to send Valentine greetings off this year but since I had a little free time today I pulled out my stash of supplies to whip up a few cards.

I kept it real simple: white cardstock, a few dies, and some really, really old embellishments from Making Memories, Paper Bliss, Little B and a few odds and ends I've collected through the years. No stamping involved. These cards have a little more bulk to them but are still mail friendly.

I really love how this card turned out with the clear window. Nice modern feel and not too frilly.
On the other cards, I scored a diamond patterned to provide additional depth and interest.


Have a few more cards I started which I'll finish up tomorrow. The hoard descended upon me this afternoon so I had to take a break from card making to Valentine box making with my nephew. He's leaning toward a Minecraft design...of course, because it's complicated. It may be a few days before I get back to those cards.

Sunday, February 4, 2018

Cool Cat Card

Today I'm sharing a card I made using stamps from MFT. I mentioned in a previous post I was on the search for 2018 go to birthday card. Something universal and easily mass produced. Undecided if this will be the one, but I did make several in one sitting.

This card uses stamps from MFT's Cool Cat and Twice the Wishes sets. I love the images in the Cool Cat set, especially the little fat cat. So adorable. With a lot of cat-loving friends, I anticipate I'll be pulling out this set often. The bow and party hat are from a Mama Elephant stamp set and adds a cute little festive touch.

I don't have a balloon stencil so I improvised by using an old punch and copy paper to create a mini stencil. I punched several, secured them onto my cardstock and then used Mustard Seed, Carved Pumpkin and Abandoned Coral Distress Inks to blend the design. I chose bright, warm colors to combat the grey skies of winter but you could opt for a cool palette or even make each balloon a different color for a real festive, party look.


Friday, February 2, 2018

JUMPING IN WITH BOTH...HANDS

Welcome 2018. The last months of 2017 sure went quickly and despite good intentions, and there are always good intentions, I never made it back to the blog. Even now, in the new year, I'm a bit late, after all, it is already February.

Last month I spent most of my time parked in front of the computer participating in MOC6 (month of challenges) at the Lilypad. I'd been planning to jump back into scrapping this year and apparently the Cosmos decided to give me a nudge via email. The goal, complete all 31 challenges. The reward, a $20 credit to the digital store. A new challenge was posted every day. Some focussed on storytelling, some on techniques and others on creativity. The challenge ends tonight so if you're stumbling onto this blog you're probably too late to participate in this year's MOC, unless you're a super fast scrapper. I'm not, but I did manage to complete all the challenges. I had a blast, learned some new things and made a small dent into the backlog of photos I'd been collecting. If you are a digital or hybrid scrapper what I can recommend is for you to check out the site and forum. The group is super friendly!

Here are 2 of the pages I completed last month. In the past, I frequently digitally mapped out the design of my layouts and then did a traditional scrap.  These layouts would certainly be easy to recreate with paper & embellishments but I think I'm going to leave them as is. Perhaps they'll end up in a printed album. We'll see.