The sentiment is from a PTI set. I copper embossed the sentiment onto a strip of vellum. I used a strip of light purple vellum behind the sentiment strip to give it a bit more pop and prevent it from blending into the background. And just for full transparency, that purple vellum is older than my nephew who's turning 24 this year. Well past time it got put to use!
Friday, September 21, 2018
CN9 Wreath Turnabout Fall
Another Fall card this time using the Concord & 9th Wreath Turnabout stamp set. I've pulled this stamp set out a number of times this year. I'm guessing I'll pull it out one more time to try a holiday-themed color palette.
The sentiment is from a PTI set. I copper embossed the sentiment onto a strip of vellum. I used a strip of light purple vellum behind the sentiment strip to give it a bit more pop and prevent it from blending into the background. And just for full transparency, that purple vellum is older than my nephew who's turning 24 this year. Well past time it got put to use!
The sentiment is from a PTI set. I copper embossed the sentiment onto a strip of vellum. I used a strip of light purple vellum behind the sentiment strip to give it a bit more pop and prevent it from blending into the background. And just for full transparency, that purple vellum is older than my nephew who's turning 24 this year. Well past time it got put to use!
Wednesday, September 19, 2018
CN9 Thank You Cards
Few more thank you cards this week. These are made using Concord & 9th products.
The background image is using the Lace Leaf stamp set. I see many people doing beautiful swashes of watercolor and inks as backgrounds. I've tried a few times but I'm just not very good. What I envision and the results are far different. More practice is needed but with so many nice messy background stamps available I really have little motivation to improve my hand at watercolor. I much rather expand my background stamp collection! This one is a winner. Like the results and it's a good size.
What I'm really swooning over at the moment though is their Double Cut Alphabet dies. Nice modern, bold feel lending itself well to masculine cards and clean design. I'm hoping they come out with the same font as already formulated words. I made 8 cards and by #6 I was a bit tired of lining up YOU to create the shadow effect. Maybe they can help a gal out?!
Tuesday, September 18, 2018
MFT Flamazing Thank You
I make a lot of thank you cards. I have many blessings in my life and am a firm believer in recognizing acts of kindness and deeds well done. It doesn't hurt belonging to an old church which frequently needs some TLC and elbow grease. Your house or God's house, it all occasionally needs work and a note of thanks to the volunteers goes a long way toward ensuring future participation.
This is one of the cards I made thinking I would enter it into MFT's Superstar challenge but then opted to go with the Snow Flurry harvest wreath.
This is one of the cards I made thinking I would enter it into MFT's Superstar challenge but then opted to go with the Snow Flurry harvest wreath.
I use the radiating template for the background. It's one of my favorites and use it frequently. The Thank You die has been in my stash for a while; it's the first time I'm using it and I really like it. The stamps are from the Flamazing stamp set.
Monday, September 17, 2018
My Favorite Things Superstar
MFT is running their Design Superstar contest. Today is the last day for entry and isn't it just like me to be getting my submission in just under the wire. My entry is for the CAS category. I actually created several cards, I'll show those later in the week. As for now....this is my card.
I used 3 different stamp sets to create the image and sentiment. The wreath was created using stamps from Snowflake Flurry. I'm still in the Fall mood so I was looking for something autumn themed. As I was going through my MFT stamps I thought some of the snowflake images looked like wheat or twigs. With the right colors, I thought it would make for a pretty harvest wreath/medallion design. Love the end design...and deceptively simple to do without any fancy tools. Really!
All I used was a 21/2" circular punch, punched from Avery removable ID labels. Folded the circle in half, opened it, folded it in half from the other side, repeated until I had 8 even folds. Took a black marker and placed a dot at the top edge of each fold, which gave me a guide so the snowflakes were evenly spaced when stamping. Centered the removable circle onto my cardstock and went to town. You do have to move the stamps around your template but it went quickly. Peel off your mask and you have a beautiful design with space for an image or sentiment.
The center image was taken from the Funky Flowers set and the sentiment from Flamazing. I used Copics to shade the flower and a shimmer pen to add sparkle to some of the leaves and detail to the flower center. One layer card for easy, peasy mailing! I'm definitely going to attempt this again.
Sunday, September 9, 2018
It's Fall Ya'll...well almost
We had a beautiful, crisp Autumn-like day today. It promises to get warmer again during the week but today had me itching for weather cool enough to pull out sweaters, boots, and scarves. I love Fall! I love the colors, the activities, the food, and the cooler temps. But since we're not quite there yet I had to feed my need by pulling out some Autumn themed stamps and dies. And yes, I still have some work to complete all my Halloween tags but sometimes you just have to take a break and go with what inspires you at the moment. At least this what I'm telling myself to justify my detour.
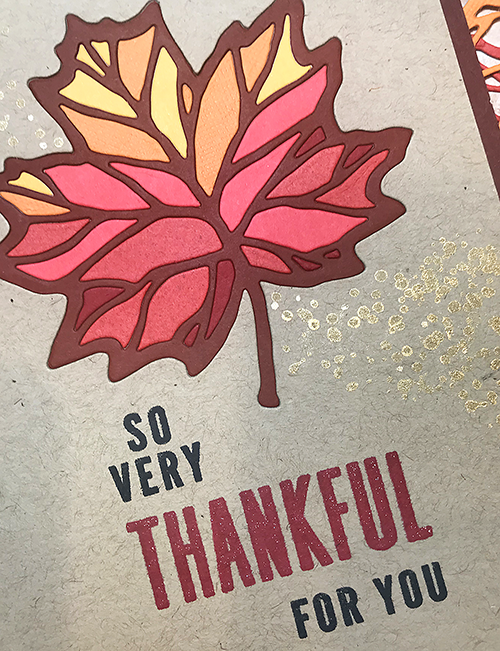
This card was created using the Thankful Leaves die and Turnabout stamp set from Concord & 9th. I'm very much into their turnabout stamps, especially the wreath builder. They create such beautiful backgrounds and focal points. On this particular card, I just used the sentiment from the Thankful Leaves Turnabout but I'm eager to experiment with actual turnabout portion. For the gold dot spray, I used a stamp from the Just Because set.
For the main image, I first die cut the leaf using a craft panel making sure I centered the image. Then I glued the die cut panel onto another panel and fitted the leaf outline into the slot. This creates a nice flat card for mailing. Then it was just a matter of filling in the pieces. Since I wanted to create an ombre effect, I pulled cardstock from my scrap pile similar in color and tone and cut several leaves.
Now I first ran the cardstock thru the Xyron so I wouldn't need to mess with gluing down the pieces, but then you're stuck pulling off the release paper...and some of those pieces are pretty tiny. I think next time the better option is to place the adhesive on the base panel then place the die cut panel on top so the adhesive is exposed in the leaf area then position the pieces. Oh well, live and learn.
Friday, September 7, 2018
Stash Busting Part II
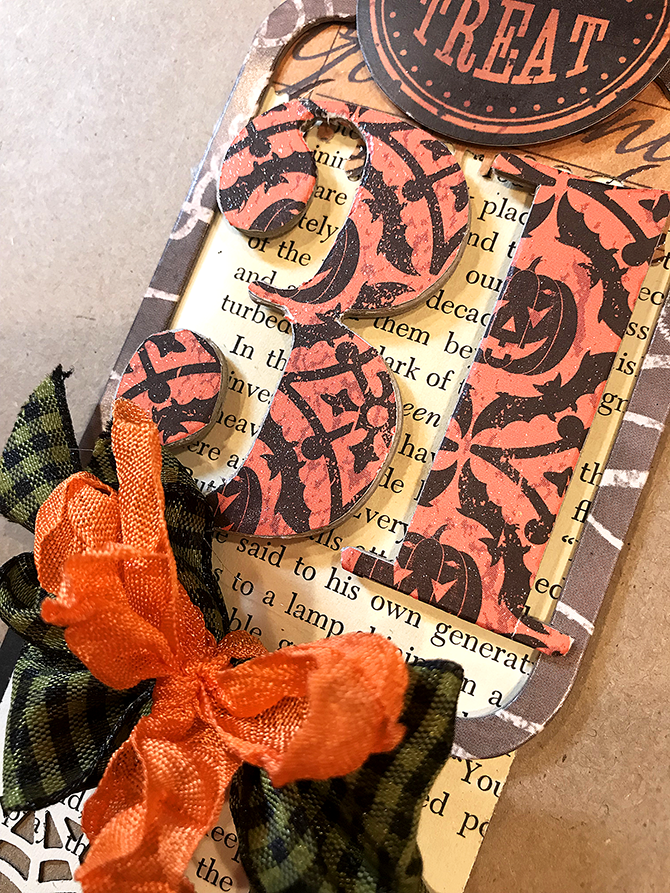
As you know, I'm diligently attempting to reduce my Halloween stash. I managed to complete little more than half the tags needed for my project on Monday using old stickers, frames, and papers. Had a lot of fun just playing and not overthinking placement or combinations. Each tag is unique. Since I often make a large number of favors for an event, the freedom from repetition is a bonus.
A few more images to share. Today promises to be another rainy day so I'm hoping to complete the remaining tags and then share the final packaging.
A few more images to share. Today promises to be another rainy day so I'm hoping to complete the remaining tags and then share the final packaging.
Monday, September 3, 2018
Stash Busting
It's a rainy, dreary day in this part of the country so today I'm spending time in the craft room prepping for Halloween. I usually don't create a lot of Halloween items, though it hasn't stopped me from collecting a lot of themed items over the years. A few cards and a few treat bags for the kids is the norm and typically in a mad dash at the end of October. This year volunteered to provide the treat bags for the Great Agers luncheon so I need to prep 36 treat bags. Good motivation to begin early and to make a hefty dent into my stash.
Here are a few peaks of the tags I'm creating. More to come.
Here are a few peaks of the tags I'm creating. More to come.
Subscribe to:
Comments (Atom)


